
How to Grow Sprouts and Microgreens
Growing fresh food indoors during the winter can seem like a challenge, but spouts and microgreens offer an easy and nutritious solution. While they may seem similar, there are important distinctions between the two that affect how they should be grown and consumed safely. In this guide, we’ll break down the differences and provide step-by-step instructions for growing both sprouts and microgreens successfully.
How Seeds Grow: A Mini Botany Lesson
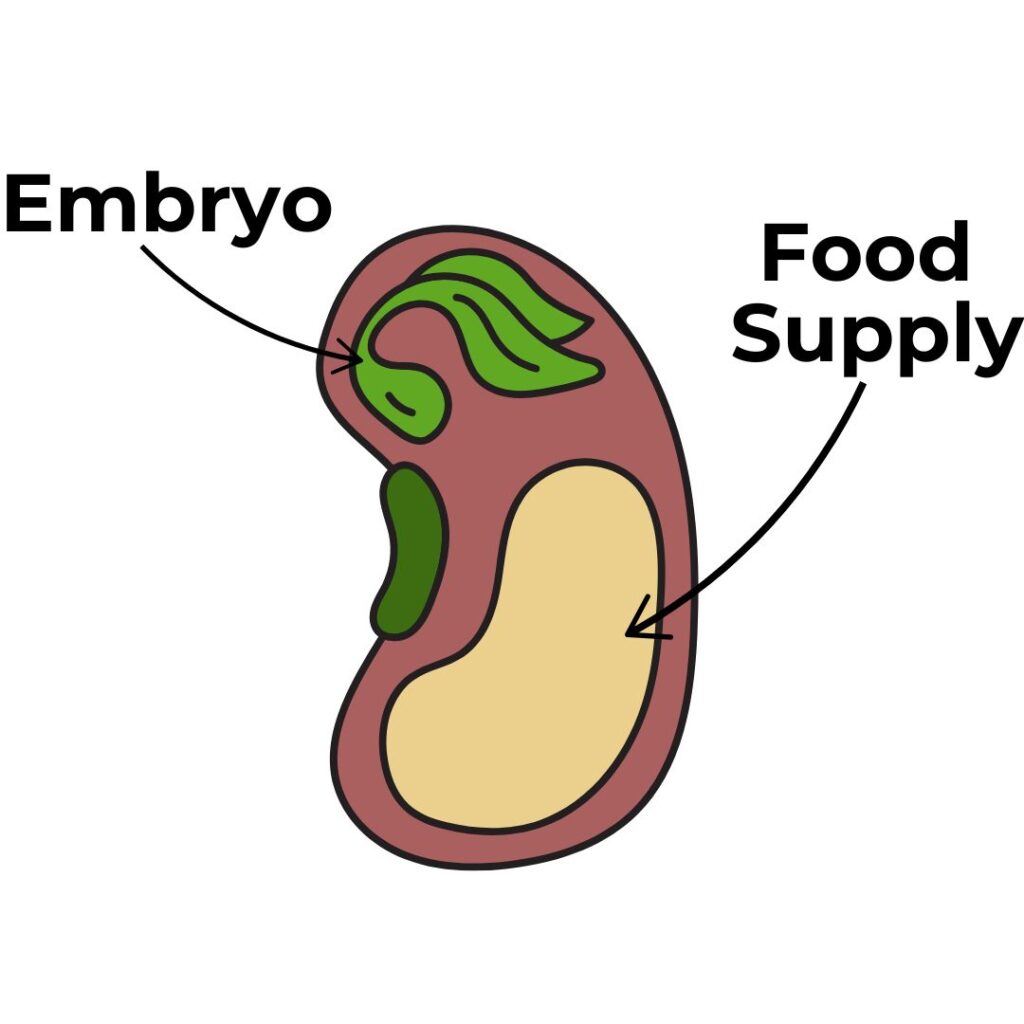
To understand the difference between sprouts and microgreens, it’s helpful to know how seeds grow. Inside every seed, there is an embryo (baby plant) and a food supply (endosperm). When the seed absorbs water, enzymes are activated, converting stored starches into sugars that fuel its growth.
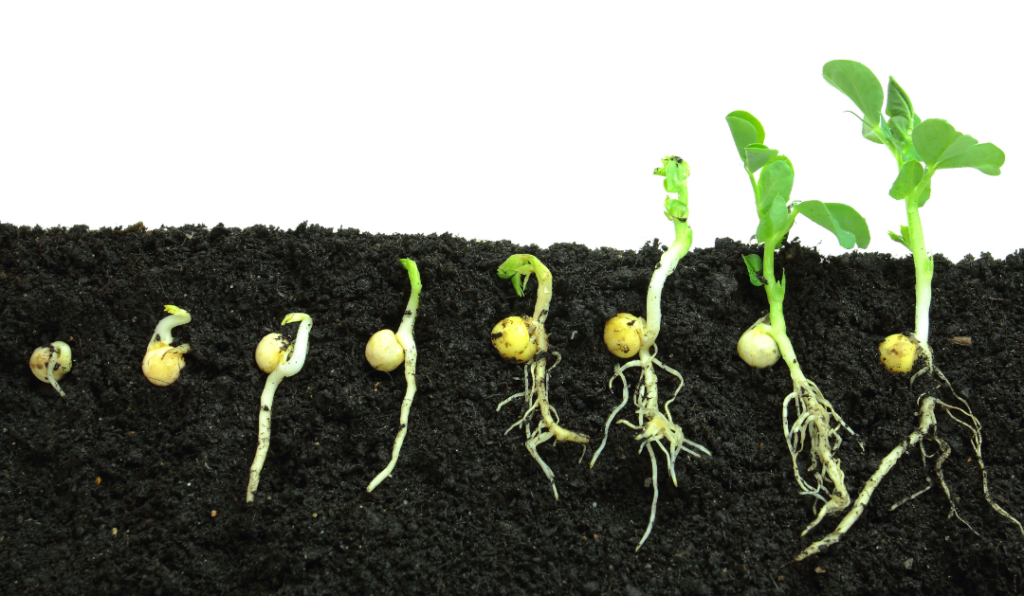
The first sign of growth is a tiny root, which anchors the plant and absorbs nutrients. Then, a small shoot emerges, growing toward the light. The first leaves, called cotyledons (or seed leaves), start photosynthesizing to help the plant grow. As the plant matures, it develops true leaves, which resemble the adult plant’s foliage.
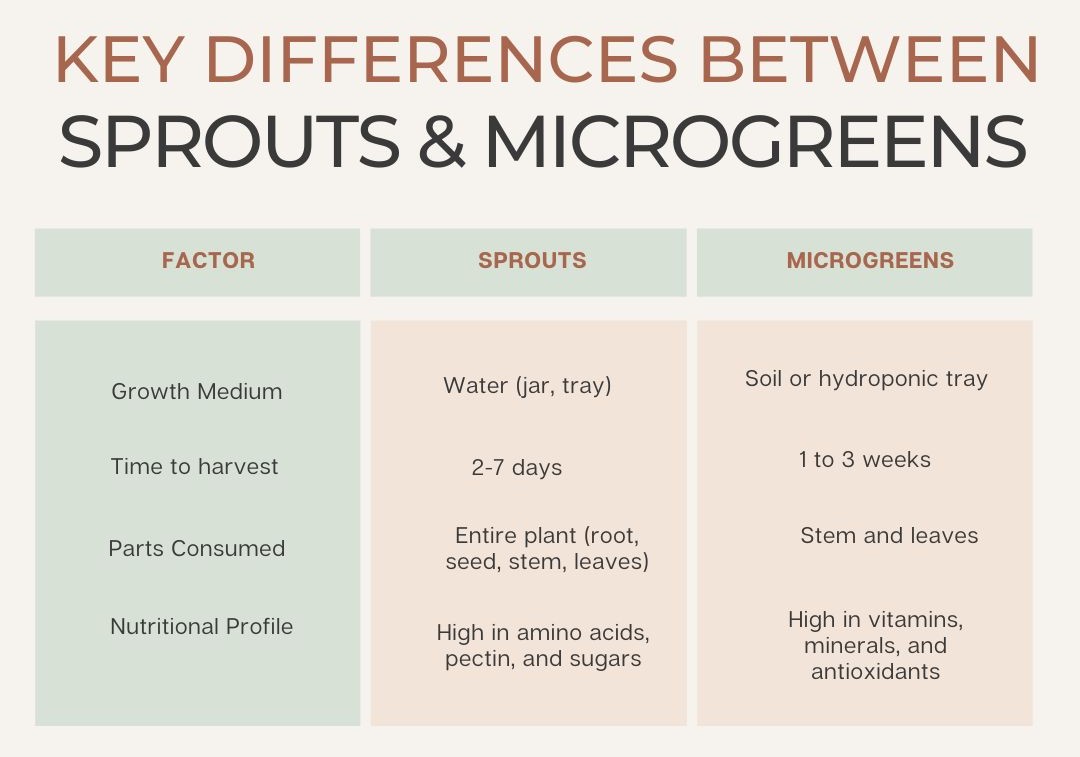
Sprouts are germinated seeds that have just barely started to produce their first little seed leaves (mostly stem). Microgreens have been allowed to grow longer, sometimes having produced a full set of true leaves.
Growing Sprouts
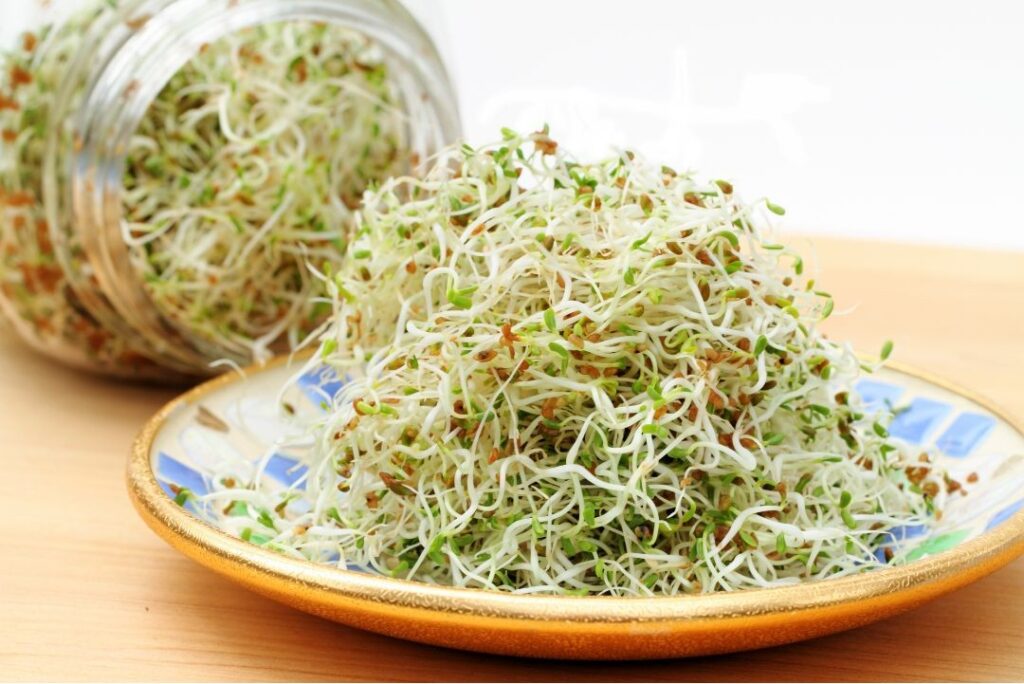
Sprouts are germinated seeds that are grown in a clean container with no soil, requiring only regular rinsing with fresh water. They are harvested within 2 to 7 days, often before they develop significant leaves. Some common types of sprouts include alfalfa, mung bean, and lentil sprouts.
Benefits of Sprouts
- Quick and easy to grow with minimal equipment
- Nutrient-dense and packed with enzymes
- Consumed whole, including the root, stem, and seed
How to Grow Sprouts
- Choose the Right Seeds: Use seeds meant for sprouting. They’re usually tested for pathogens that would be likely to reproduce to dangerous levels if grown in the moist, warm environment used for sprouting.
- Soak the Seeds: Place seeds in a clean jar (about 1-2 tablespoons, depending on type of seed and size of jar). Cover with water for 6 to 12 hours.
- Drain and Rinse: Drain the water and rinse the seeds thoroughly. There are sprouting lids on the market for this purpose, but you can also simply place cheese cloth over the mouth of the jar and hold it down with the ring lid or a rubber band. The water will run out, leaving the seeds inside the jar.
- Repeat Step 3: Rinse and drain seeds twice a day. Regular rinsing with fresh water helps prevent mold and bacterial growth.
- Harvest: In 2 to 7 days (depending on the type of seed), when the sprouts reach the desired length, they are ready to eat. Rinse one final time before consuming.
Growing Microgreens
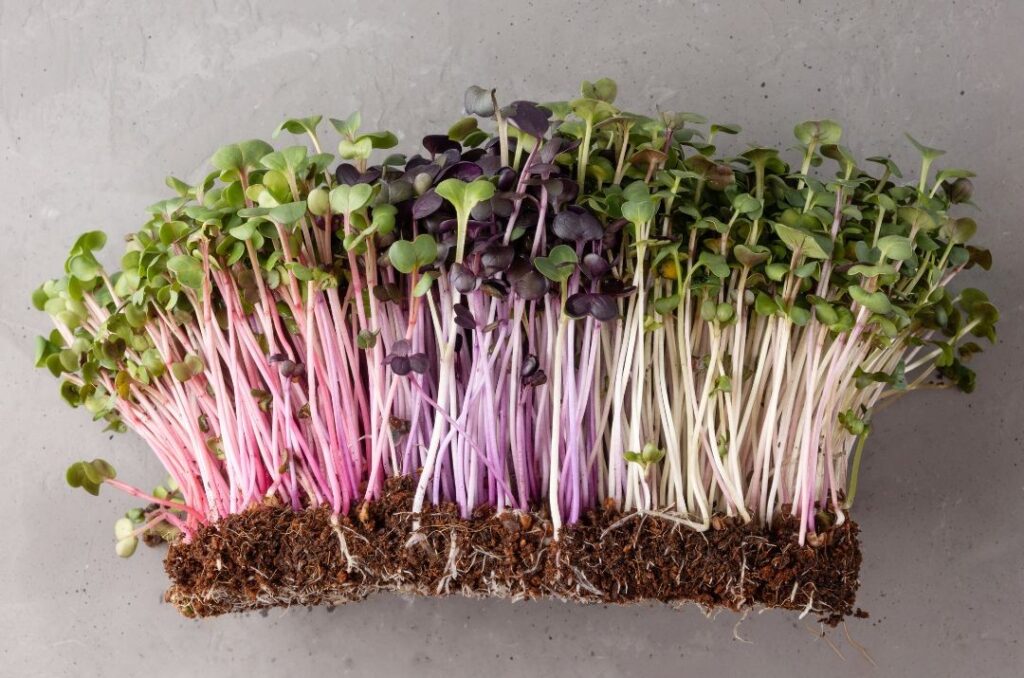
Microgreens are the next stage of growth beyond sprouts. Unlike sprouts, microgreens are usually grown in soil or a hydroponic system and are harvested later – once their cotyledons have fully developed and sometimes when their first true leaves begin to emerge. Popular microgreens include radish, sunflower, and pea shoots.
Benefits of Microgreens
- Can be grown with or without soil
- Rich in vitamins, minerals, and antioxidants
- Offer a wide variety of flavours, from mild to spicy
How to Grow Microgreens in Soil
- Prepare a Shallow Tray: Fill a shallow tray with a light potting mix. The tray should have drainage to avoid oversaturating the roots. There are trays on the market specifically for growing microgreens that include a shallow tray with drainage that nests into a bottom tray without drainage. You can also get creative and use containers out of your recycling bin.
- Scatter Seeds Evenly: Spread seeds across the soil surface without burying them. Seeds can be very close together since the plants will not grow for long before being harvested.
- Water: If you have a microgreens tray nested inside a bottom tray, water in the bottom tray to avoid dislodging the seeds. If you are not using a bottom tray, mist the seeds with a spray bottle until they have germinated and sent down a root to anchor them in the soil. Keep the soil moist but not soggy.
- Provide Light: You can opt to keep the tray in the dark (e.g., place another tray on top) until they germinate, but most seeds will germinate just fine without a dark environment. You can also keep an opaque cover over the seeds until they have started to grow a stem if you want longer stems and less leafy growth. Eventually (after about a week), you will need to expose your microgreens to strong light so they can photosynthesize and start producing vitamins and antioxidants. Preferably you will use a grow light, but a bright window will also work for quick-growing plant varieties.
- Harvest: In 1 to 3 weeks, when cotyledons are fully developed and true leaves begin to appear, use scissors to cut the microgreens just above the soil line.
How to Grow Microgreens Hydroponically
- Use a Hydroponic Tray: Select a tray designed for hydroponic microgreens.
- Place Seeds on the Mesh Tray: Scatter seeds evenly over the tray’s surface.
- Keep roots hydrated: Initially, spray the seeds with a spray bottle to keep them moist until germination. Then, add water to the tray below so roots can access moisture. Refresh the water daily.
- Optional – Use Nutrients: You can grow microgreens for a week or two in just water, but if you want them to grow bigger without soil, add water-soluble fertilizer. Use fertilizer with caution to avoid excessive nitrate accumulation. There are parts per million test kits you can use at home to ensure the proper ratios.
- Harvest: Cut the greens when they reach the desired size. You can let your microgreens grow to whatever size you enjoy, from merely having their first seed leaves to having a full set of true leaves. Adjust your harvest timing to get the taste and texture you prefer.
Final Thoughts and Getting Started
Sprouts and microgreens are a fantastic way to grow fresh, nutritious food indoors, even in the dead of winter. Both methods require minimal space and effort, making them perfect for beginners and experienced gardeners alike.
Give both a try and see which you prefer! Whether you enjoy the crunch of sprouts in a sandwich or the vibrant flavours of microgreens in a salad, you’ll be adding a powerful nutrition to your diet with ease.